
I started shooting with the Sony ZV-E1 after years on an iPhone 14 Pro, and I genuinely thought exposure would be the easy part.
Point camera. Check screen. Record. Done.
That worked on the phone because the phone does a lot of silent correction. On the ZV-E1, that mindset gave me weeks of footage that looked fine in camera and frustrating in post. I had clips where the sky looked clean while the subject felt lifeless. I had clips where skin looked okay on the LCD, then broke into noise when I lifted shadows in grading. I had days where every second shot looked like it came from a different exposure strategy, because honestly, it did.
This post is what I wish I had when I started: a real-world Sony ZV-E1 Histogram guide based on repeated use, repeated mistakes, and a few moments where exposure decisions either saved a shoot or made my edit session miserable.
I am keeping this long on purpose because exposure mistakes are repetitive, and the fixes are not one-liners. If you’re trying to build topical authority around ZV-E1 exposure, this gives you the complete field context, not just menu instructions.
Why this mattered to me more than specs
The first thing that surprised me was emotional, not technical.
When I trusted the camera screen too much, I stopped trusting my own footage. That creates a very specific stress: you finish shooting and already feel nervous about edit. Then you open the timeline and confirm your fear. Highlights are clipped in one region. Midtones are weak in another. Recovery introduces texture issues. The clip is usable, then not usable, then maybe usable with compromises.
That pattern happened enough times that I started paying close attention to every Sony ZV-E1 Exposure Tools option instead of only relying on visual preview.
At first I treated the histogram like a magic graph. Then like an enemy. Then like noise. Finally I started treating it like a meter with a job.
That was the turning point.
Sony ZV-E1 Histogram in real usage
My repeatable workflow now is simple:
- Pick scene priority first.
- Use zebra as immediate warning.
- Use histogram as confirmation.
- Accept one compromise consciously.
This sounds basic, and it is basic. Basic is exactly what survives pressure.
On location I do not have the luxury to debate every frame like it is a cinema master shot. I need fast confidence. Zebra gives quick guardrails. Histogram gives context. The combination is what reduced errors over months.
I still miss sometimes, especially with difficult contrast and variable aperture zooms, but the miss rate is much lower than early weeks.
[VIDEO: Fast setup sequence showing zebra first, histogram second, then record]
Mirrorless Camera Histogram: what beginners assume vs what actually happens
A lot of people coming from smartphones assume any Mirrorless Camera Histogram works like a quality meter.
It does not.
It shows tonal distribution. That is useful. It does not decide your story priority. It does not know whether your subject face matters more than your sky detail. It does not know if you are intentionally keeping a moody shadow shape. It does not know if you are planning a soft grade or a heavy grade.
My early mistake was trying to make the histogram “look correct” in a generic way. That led to over-protecting highlights and weak subject midtones. In post I paid for it. I had data, but not the right balance.
So the actual sequence became:
- creative intent first
- warning tool second
- distribution tool third
Once I did that, the graph became helpful.
Exposing S-Log3 ZV-E1: where theory met irritation
If you are Exposing S-Log3 ZV-E1, you already know the internet has two extremes: very technical advice with no field context, or very casual advice that skips consequences.
My practical experience:
- S-Log3 gave me flexibility when capture decisions were disciplined.
- S-Log3 punished lazy midtone choices very quickly.
- “Looks okay on LCD” was unreliable if I skipped proper meter checks.
There were indoor takes where I exposed by feel, then in grading I had to push skin too far. The footage survived, but it looked worked-on. I could see the stress in the image.
Then there was one talking-head setup with the Sony FE 16-35mm f/4 PZ OSS where histogram showed weak midtone body even though the LCD looked acceptable. I added light and adjusted exposure before the real take. That clip looked normal and clean in post. No rescue vibe.
That one moment changed my habit permanently.
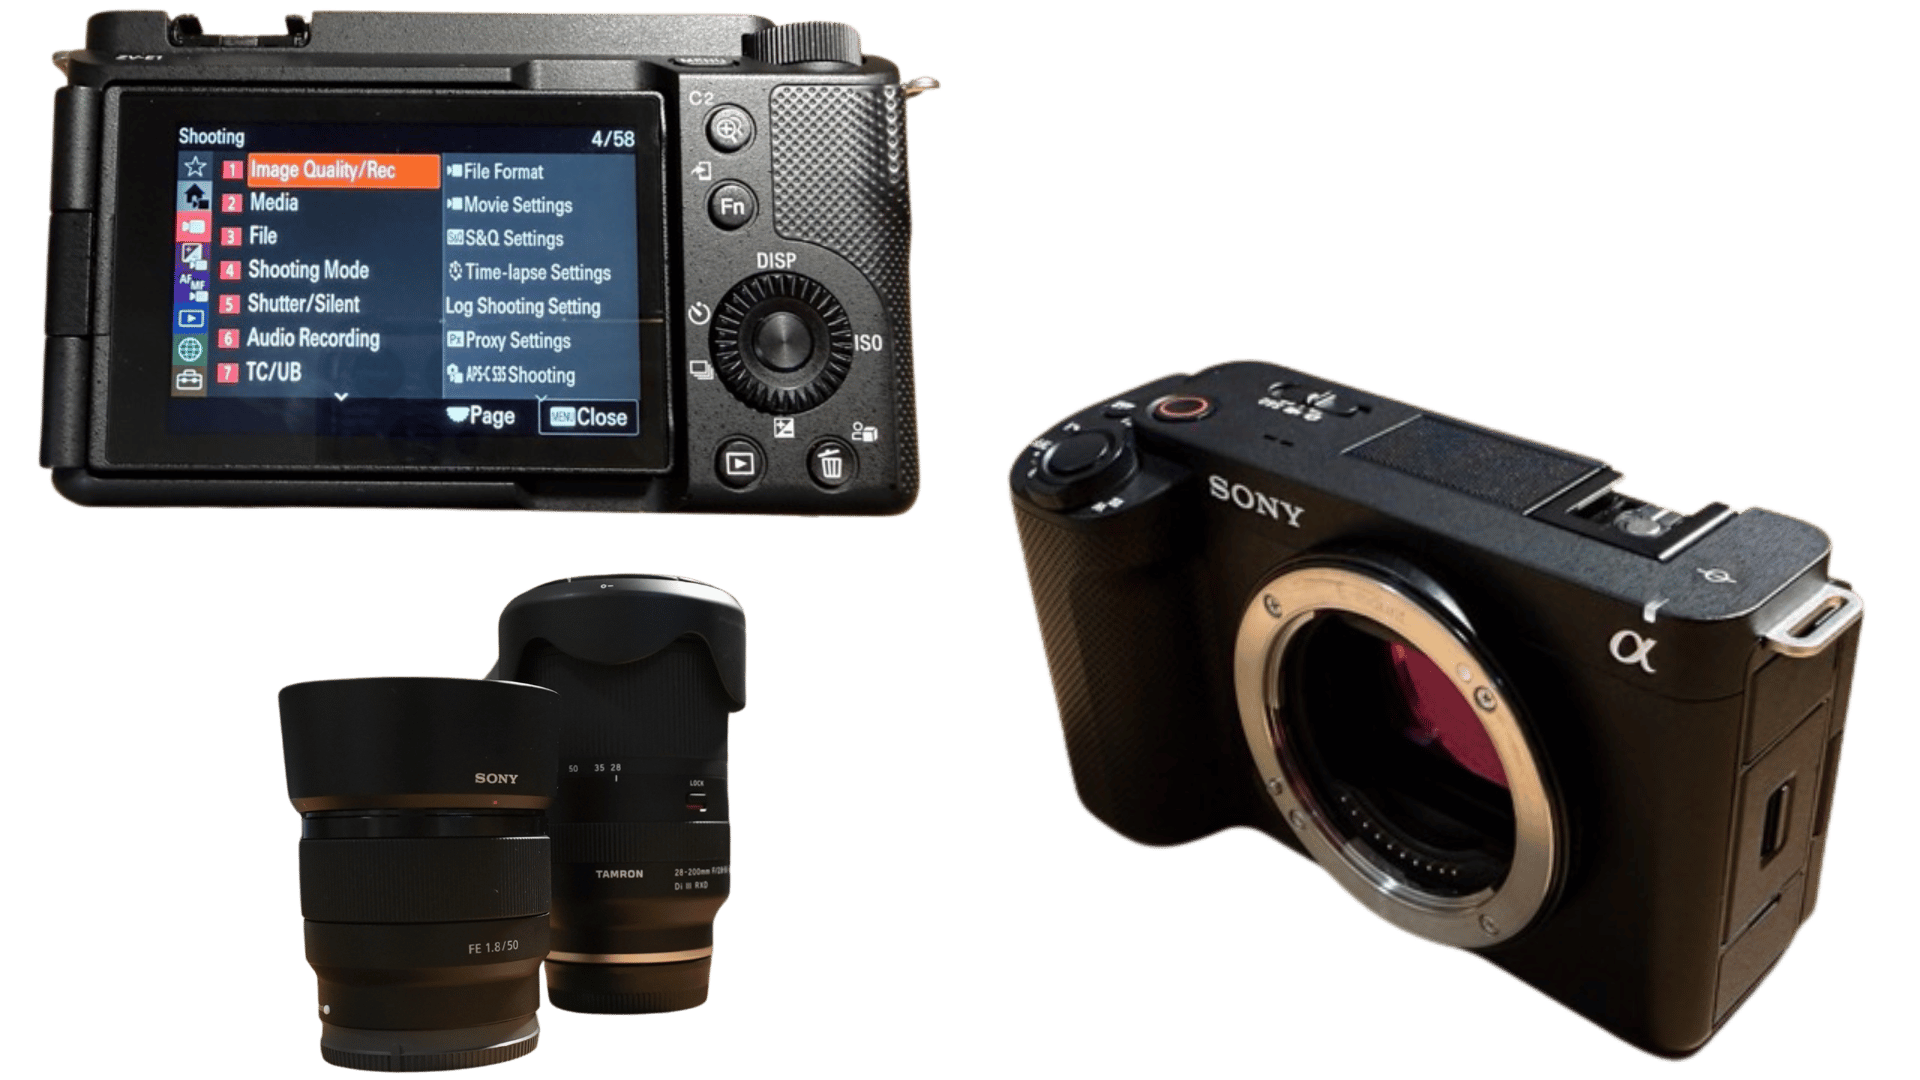
Sony ZV-E1 Exposure Tools: what I use and what I skip
The ZV-E1 gives enough monitoring tools to make good decisions. It also gives enough options to overcomplicate your life if you keep toggling everything every five seconds.
The Sony ZV-E1 Exposure Tools I actually use in repeated work:
- Zebra (primary quick warning)
- Histogram (secondary distribution check)
- Exposure comp adjustments where relevant to shooting mode
- Short test clips before long takes in difficult light
What caused frustration:
- constant LCD info view switching
- over-monitoring instead of shooting
- reacting late to changes from variable aperture zoom behavior
This part gets annoying in fast sessions. Interface friction turns into exposure errors because every extra control step increases rushed decisions.
I eventually reduced overlays and stuck to a fixed pre-shot routine. Less fiddling, better consistency.
CineEI Exposure Guide mindset for creators
Even if you are not running a full cinema pipeline, borrowing a CineEI Exposure Guide mindset helps.
What I mean by that in plain language:
- decide your monitoring and exposure reference before action starts
- stop changing your logic shot to shot based on panic
- treat each scene block as a system, not isolated guesses
During one outdoor sequence I used to adjust every few seconds while walking through patchy sunlight. The result was exposure pumping and clip mismatch in edit. After adopting a more fixed reference mindset, I got fewer jumps and smoother sequence matching.
You can call this discipline, you can call it workflow maturity, whatever. It matters.
ETTR (Exposing to the Right): helpful, dangerous, and frequently misunderstood
ETTR (Exposing to the Right) sounds simple in theory: push exposure right without clipping critical highlights, gain cleaner shadow data.
In practice on run-and-gun creator shoots:
- ETTR can improve recoverability when scene contrast is moderate.
- ETTR can hurt skin balance if you force it blindly in mixed light.
- ETTR can tempt you into “graph chasing” instead of subject-aware decisions.
My repeated mistake was leaning too hard toward highlight safety and white-side placement. I got technically safe frames that felt emotionally flat. In other words, the graph looked controlled and the person looked underpowered.
That does not mean ETTR is bad. It means ETTR needs context.
I now ask:
- Is this scene stable enough for deliberate right-side placement?
- Is my subject priority still preserved?
- Will this clip sit with nearby clips in the sequence?
If all three feel good, ETTR strategy works well.
If they do not, I avoid forcing it.
Luma Waveform vs Histogram on ZV-E1 workflow

People ask about Luma Waveform vs Histogram all the time. On this camera, in my real workflow, histogram plus zebra gave me most of the practical speed I needed.
The larger point:
- histogram = global distribution awareness
- zebra = local warning on critical highlights/tones
- waveform (where available in broader workflows) = precise luminance mapping by image position
When you compare Luma Waveform vs Histogram, waveform can be more descriptive for exact placement decisions. Histogram is faster for quick distribution sanity checks.
For me, the deciding factor was pace. I shoot creator-style sequences with frequent framing shifts. Histogram + zebra is quick enough to stay in flow.
If your workflow is more deliberate and controlled, waveform-style monitoring logic gives tighter targeting. Different rhythm, different tool emphasis.
Real shoot log: seven scenarios where histogram changed results
1) Outdoor walk-and-talk, bright afternoon
I used zebra first, histogram second. Sky protection stayed manageable, subject stayed usable, sequence looked more consistent than earlier attempts.
Consequence: less continuity correction in edit.
2) Early beginner footage, no histogram discipline
Everything felt off in a different way. Some clips too bright, others too dark. Fixing one issue created another.
Consequence: edit time exploded.
3) Indoor talking head at f/4
Histogram showed weak midtones before final take. I added light and corrected.
Consequence: cleaner skin and lower noise after grade.
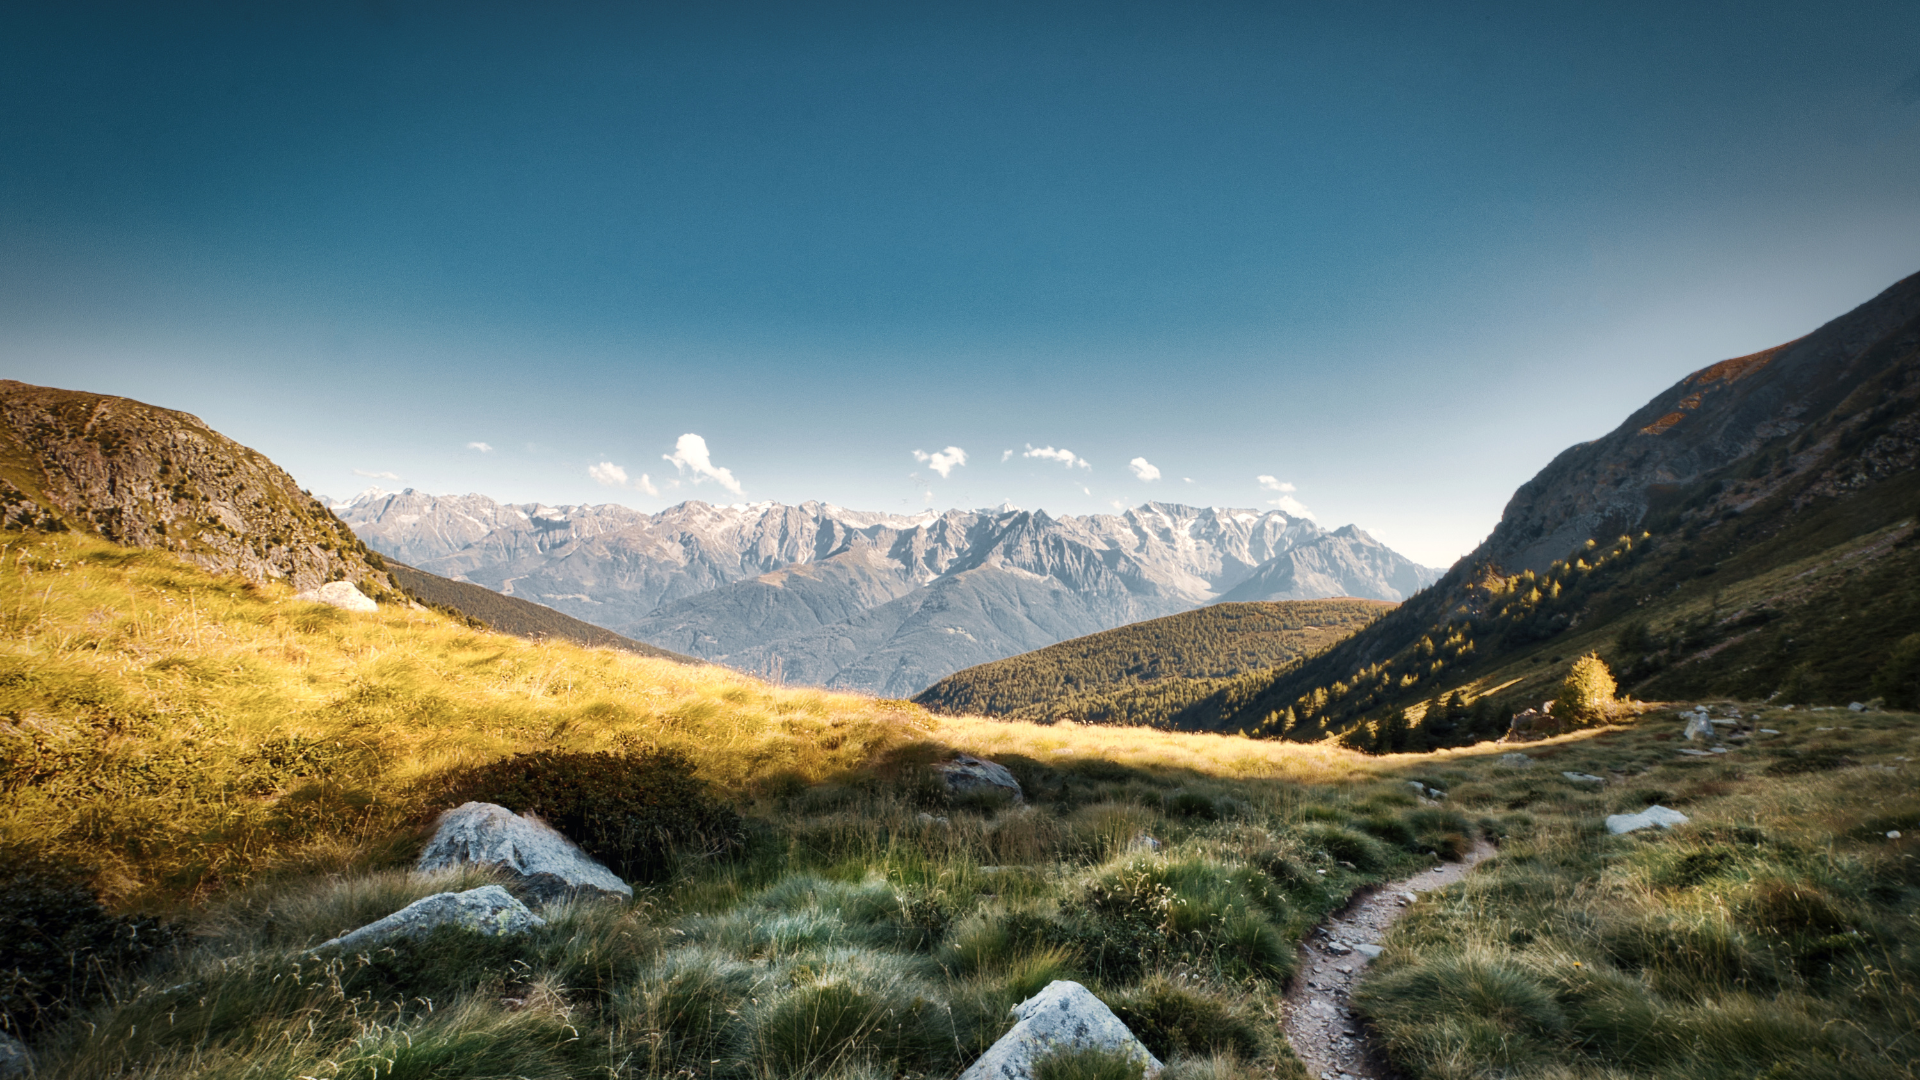
4) Blue Mountains National Park, January 2026, midday
Extreme contrast. Protecting sky dropped subject too low. Lifting subject clipped sky quickly. I switched to bracketing with tripod.
Consequence: final blended result matched scene memory better.
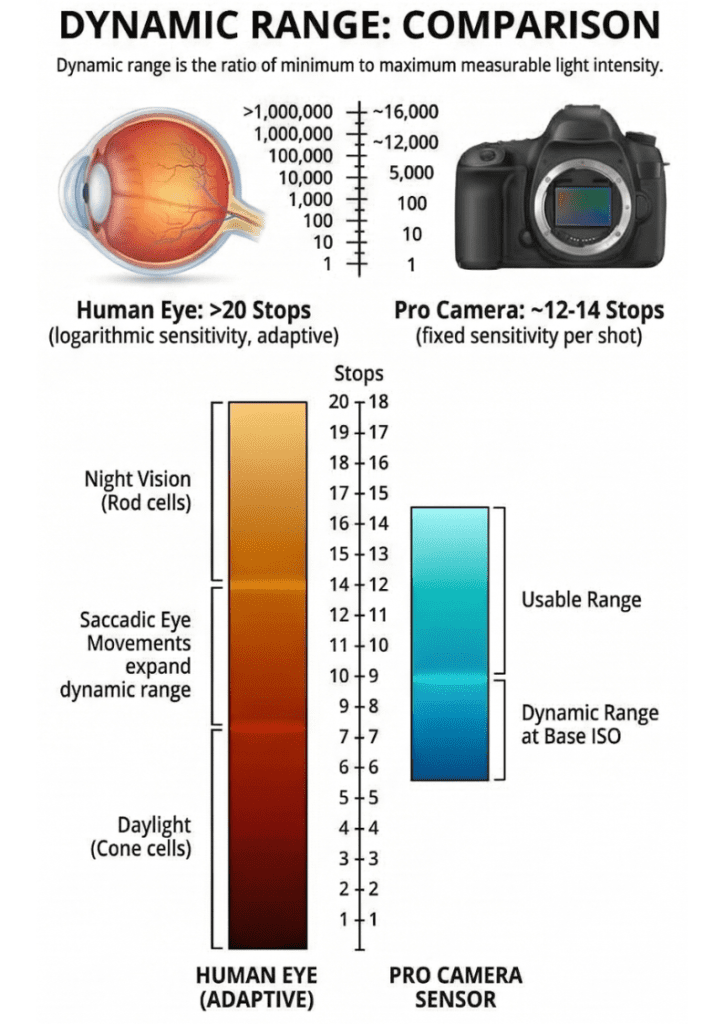
The human eye can adapt across a much wider scene brightness range than a single camera exposure can hold. That is why a mountain view can look balanced to you in person while the camera forces a hard choice between sky detail and shadow detail.
5) Tamron 28-200 variable aperture b-roll
Aperture ramp during zoom caused silent exposure drift. Histogram became reactive patch when I failed to pre-plan focal windows.
Consequence: mismatched clips in same sequence.
6) Fast vlog recording with frequent reframe
Excessive info display toggling broke pace and confidence. Simplified overlay routine reduced mistakes.
Consequence: fewer rushed capture decisions.
7) Stills during video-first day
Histogram helped make technically acceptable stills for online use. For still-focused professional delivery, I still prefer tools built around still-first workflow.
Consequence: realistic expectations saved frustration.
Long-tail questions answered from actual field experience
These are the exact pain-point questions people ask around ZV-E1 exposure.
“How to read Sony ZV-E1 histogram in bright sunlight”
In bright sun, LCD perception lies to you more than usual. I do three fast checks:
- Set zebra threshold for your critical highlight tolerance.
- Confirm histogram crowding direction.
- Lock one priority: subject or highlight texture.
If the scene has severe contrast, accept that one frame may not hold everything. In Blue Mountains harsh midday light, this question had one practical answer: bracket and move on.
Also useful: shade your screen with your hand briefly while checking. Small move, big clarity.
“Why my ZV-E1 footage is noisy despite a perfect histogram”
I’ve seen this happen and had it myself.
Reasons from real use:
- midtones too weak even when distribution looked “safe”
- underexposed subject lifted heavily in post
- indoor lighting insufficient with slower aperture lens
- clipping avoidance over-prioritized at expense of subject integrity
A graph can look clean while your subject data is weak for your grading plan. That mismatch is where “perfect histogram, noisy footage” usually lives.
“Best exposure settings for Sony ZV-E1 S-Log3”
There is no single best setting that works for all scenes. What worked repeatedly for me:
- define scene priority before touching controls
- stabilize zebra usage
- use histogram as confirmation, not the main judge
- record short test clips in difficult light
- avoid panic exposure changes mid-sequence
For indoor talking heads on the 16-35 f/4, adding light solved more problems than menu tweaks.
“Histogram vs Zebras: Which is better for Sony ZV-E1?”
For my workflow: zebras first, histogram second.
Zebras answer “where is warning happening right now.” Histogram answers “how are tones distributed overall.”
Using only one gave me weaker decisions. Using both, in that order, gave me speed and context.
“How the ZV-E1 histogram ruins skin tones in backlit scenes”
The histogram does not ruin skin tones by itself. Decision order ruins skin tones.
Backlit scenes push creators to protect highlights aggressively. Skin then drops too low. Later correction creates brittle texture or noise.
Fix from repeated use:
- pick skin priority first when the person is the story anchor
- allow controlled highlight compromise when needed
- verify midtone strength before committing long takes
“Does the Sony ZV-E1 histogram show RAW or JPEG data?”
In practical shooting behavior, what you are seeing reflects processed preview behavior, so treat it as an exposure guidance tool tied to the current image pipeline and settings context, not as a pure untouched sensor readout.
For creators, the useful takeaway is operational:
- monitor consistently with the same profile logic
- run quick validation clips in your edit workflow
- avoid mixing assumptions from different monitoring contexts mid-shoot
If you need strict technical calibration, validate with your own controlled tests in your exact profile and grading pipeline.
“Using the histogram for ZV-E1 long exposure photography”
For long exposure stills on ZV-E1, histogram helps with highlight clipping risk and tonal spread, especially around bright points like street lights or reflections.
Field notes from occasional long-exposure tests:
- preview can trick you in dark scenes
- histogram helps prevent accidental blowouts in concentrated highlights
- bracket if scene has both very bright and very dark regions
- stability and timing matter more than perfect graph shape
If long exposure stills are your main genre, build a still-first workflow around that goal. For mixed creator use, histogram is still useful for fast safety checks.
[VIDEO: Night long-exposure still workflow with histogram checks and bracketed stills]
The mistake pattern I keep fighting
Even now, after months, I still catch myself drifting into highlight obsession.
It usually happens on high-contrast days when I feel time pressure. I start nudging exposure to protect bright areas and forget to evaluate whether the subject still carries weight. The graph looks controlled. The image feels thin.
I now use one spoken line before recording difficult scenes:
“Subject priority first. Highlight compromise accepted.”
That sounds silly if you read it cold. In the field, it works. Spoken cues reduce second-guessing.
Editing impact: where exposure discipline actually pays off
People often frame exposure as a capture-only issue. In real creator workflow, exposure quality is really an editing-time issue too.
Before histogram discipline:
- more rescue-level correction
- more shot mismatch
- more time spent fixing avoidable mistakes
- less energy for pacing and story
After building routine:
- cleaner first pass
- faster sequence matching
- fewer extreme corrections
- more focus on creative polish
This is the part that made me stick with the workflow. It gave me my evenings back.
Extended practical guide for topical authority
This next part goes deeper on each keyword cluster so the article remains comprehensive and context-rich.
Sony ZV-E1 Histogram checklist (daily use)
Before each scene:
- Choose scene priority.
- Check zebra threshold behavior.
- Confirm histogram spread.
- Record short test if uncertain.
After each scene:
- Mark risky clips.
- Review one or two samples on larger screen.
- Note repeated failure pattern.
Weekly:
- Review one high-contrast shoot.
- Review one indoor talking-head shoot.
- Compare exposure decisions and editing consequences.
Mirrorless Camera Histogram training plan (4-week)
Week 1: static indoor subjects, consistent lighting.
Week 2: outdoor open shade and direct sun transitions.
Week 3: backlit scenes with skin-priority decisions.
Week 4: high-contrast midday with bracketing decisions.
This plan teaches consequence faster than reading settings lists.
Exposing S-Log3 ZV-E1 in mixed light
Mixed light makes overconfidence expensive. I handle it by locking one exposure philosophy for a sequence block instead of improvising every shot.
Example:
- block A: subject priority in semi-shade
- block B: background detail priority for establishing shots
- block C: balanced compromise for movement shots
Each block gets its own clear exposure intent. This reduced random drift.
Sony ZV-E1 Exposure Tools minimal setup
If your current setup feels chaotic, simplify:
- keep zebra on
- keep histogram available
- reduce non-essential display clutter
- stop changing your monitoring approach mid-sequence
Complex menus can feel like control. Stable routine gives results.
CineEI Exposure Guide adaptation for solo creators
You can adapt cinema discipline without turning your shoot into a lab.
- stable reference
- repeatable checks
- intentional compromise
- sequence consistency over isolated perfection
That mindset solved more issues for me than any “best settings” preset.
ETTR (Exposing to the Right) decision gates
Use ETTR when:
- scene contrast is manageable
- subject priority remains intact
- sequence continuity stays coherent
Avoid aggressive ETTR when:
- backlight pushes skin too low
- clip matching across sequence is already fragile
- you are rushed and likely to over-correct
Luma Waveform vs Histogram quick decision logic
Choose histogram-centered workflow when speed is critical and framing changes often.
Choose waveform-centered workflow when precision mapping is critical and scene setup is controlled.
Both are valid. Workflow rhythm decides.
Deep FAQ expansion for AEO intent
This section intentionally answers intent-heavy questions in natural language with context from real shooting.
How to read Sony ZV-E1 histogram in bright sunlight without overreacting
Bright sunlight creates two traps: perception errors on the LCD and panic adjustments. I avoid both by using fixed micro-steps.
Micro-step routine:
- Stabilize framing for five seconds.
- Check zebra warnings only on critical regions.
- Glance histogram for global crowding.
- Decide compromise once.
- Record and move.
The key is decision lock. If you keep re-deciding every few seconds, you will get inconsistent clips.
Why my ZV-E1 footage is noisy despite a perfect histogram, deeper answer
Noise is often a midtone problem disguised as a histogram misunderstanding.
If your subject lives too low in useful exposure range for your grading plan, then a “safe” histogram still leads to noisy correction. This is common indoors when lens aperture and lighting are limiting.
During one indoor session, the histogram shape looked acceptable at a glance. Skin still lacked strength. I added light and slightly adjusted exposure. The next take looked normal in grade.
Noise complaints often improve faster from capture discipline than from post plugins.
Best exposure settings for Sony ZV-E1 S-Log3, realistic answer
Realistic answer: settings are secondary to decision process.
A reliable sequence:
- define priority
- stabilize monitoring
- check before long take
- preserve continuity over hero-frame temptation
S-Log3 rewards consistency more than clever tweaks.
Histogram vs Zebras: Which is better for Sony ZV-E1, expanded
Asking which one is better is understandable. In practice they solve different problems.
Zebra = fast location-based warning.
Histogram = global spread and bias awareness.
When I used zebra alone, I missed global drift.
When I used histogram alone, I moved too slowly and overthought.
Together they gave speed plus confidence.
How the ZV-E1 histogram ruins skin tones in backlit scenes, expanded
Backlight compresses your margin for error. If your decision priority is unclear, your skin tones usually lose first because creators often protect bright backgrounds instinctively.
My fix:
- if the person matters most, expose for subject integrity
- keep highlight compromise intentional
- avoid trying to satisfy every bright region
Skin quality improved once I stopped treating bright-background retention as an automatic top priority.
Does the Sony ZV-E1 histogram show RAW or JPEG data, practical interpretation
Creators mostly need one practical rule: do not assume your on-camera histogram is a pure untouched truth of sensor data. Treat it as monitoring guidance in your active processing context.
Then validate with short clips and your grading workflow.
This approach avoids technical debates that do not improve results on real shoots.
Using the histogram for ZV-E1 long exposure photography, expanded field notes
For night city long exposures:
- histogram helps keep bright light sources from clipping into ugly patches
- bracketed stills can preserve scene feel better than forcing one compromise
- tripod stability matters more than tiny graph perfection
If your long exposure work is occasional, keep workflow simple and repeatable. If it is primary, run dedicated calibration sessions for your preferred look.
My scene-based playbook (12 practical situations)
Scene 1: indoor daytime interview with window spill
Priority: face detail.
Action: zebra for highlights, histogram for midtone confidence.
Failure if rushed: skin goes thin.
Scene 2: indoor night interview with practical lights
Priority: controlled mood without weak subject data.
Action: add light before increasing correction burden later.
Scene 3: outdoor open shade dialogue
Priority: natural skin and sequence continuity.
Action: avoid unnecessary right-side pushing.
Scene 4: direct sun movement shot
Priority: continuity while moving through patches.
Action: one philosophy per block, fewer reactive changes.
Scene 5: high-contrast overlook
Priority: realism.
Action: bracket when compromise degrades subject too much.
Scene 6: variable aperture zoom b-roll
Priority: consistency.
Action: pre-check focal endpoints.
Scene 7: product detail indoors
Priority: texture retention.
Action: control reflections before exposure compensation panic.
Scene 8: backlit portrait
Priority: subject presence.
Action: accept controlled background trade-off.
Scene 9: mixed-light street sequence
Priority: coherent sequence look.
Action: lock strategy for scene block.
Scene 10: small room, slower lens
Priority: usable midtones.
Action: add light and verify histogram body.
Scene 11: fast creator vlog
Priority: pace plus reliability.
Action: quick checks at transitions only.
Scene 12: stills capture during video-first shoot
Priority: practical deliverable quality.
Action: use histogram for safety, avoid derailing primary video workflow.
The regret test I now use before shoots
I ask three questions before leaving a location:
- Did I choose priorities intentionally or reactively?
- Did my monitoring routine stay consistent?
- Will I be fixing avoidable mistakes tonight?
If answer three is yes, I review notes immediately and adjust next sequence.
This tiny habit kept me from repeating the same exposure errors week after week.
What I would tell a first-time ZV-E1 user in one breath
Learn zebra and histogram together. Stop treating the LCD preview as final truth. Decide what matters in each frame before touching exposure. Add light indoors earlier than you think. Respect variable aperture behavior. Bracket high-contrast scenes when one frame keeps failing. Keep your routine simple enough to repeat when tired.
That is the practical version.
Final thought
The Sony ZV-E1 Histogram became useful for me when I stopped expecting it to remove difficult decisions.
It gives me visibility. I still choose the trade-offs.
Some days it feels smooth. Some days I still over-correct and catch myself halfway. The difference now is I can see the failure pattern while shooting, not only during editing.
That changed my output quality and my stress level more than any single settings tutorial ever did.
There is probably a cleaner ending than this.
I’ll leave it there.
[IMAGE: Final balanced frame from indoor talking-head shoot with exposure notes] [VIDEO: Timeline comparison of early inconsistent exposure vs current workflow]
Extended Field Notes: what changed after months, week by week
I’m adding this because short blog posts hide the real shape of learning exposure. My progress with the Sony ZV-E1 Histogram never looked linear. It looked messy for a while, then boring, then suddenly useful.
Week 1 to Week 2
I was still in smartphone mode mentally. I checked framing first, not exposure behavior. I assumed if the screen looked okay, the file would be okay. I ignored histogram most of the time because it felt like visual noise.
Result:
- highlights clipped in bright sky
- subject frequently too low in midtones
- inconsistent sequence look
Week 3 to Week 5
I started reading histogram constantly and overreacting to it. This phase felt “technical,” which gave false confidence. I over-protected highlights and under-served the subject.
Result:
- safer highlight retention
- flat subject rendering
- extra shadow lifting in post
Week 6 to Week 10
Zebra became primary. Histogram became confirmation. Decision speed improved. I stopped making five small changes and started making one clear change based on scene priority.
Result:
- fewer random exposure swings
- better clip matching
- more predictable edits
Month 3 onward
The biggest change was psychological. I could predict failure before recording. I knew if a frame would break at highlights first or at subject midtones first. That prediction habit reduced panic.
And this is important for topical authority around Mirrorless Camera Histogram use: prediction matters more than tools. Tools support prediction. Tools do not create it.
How I apply Sony ZV-E1 Exposure Tools for three content styles
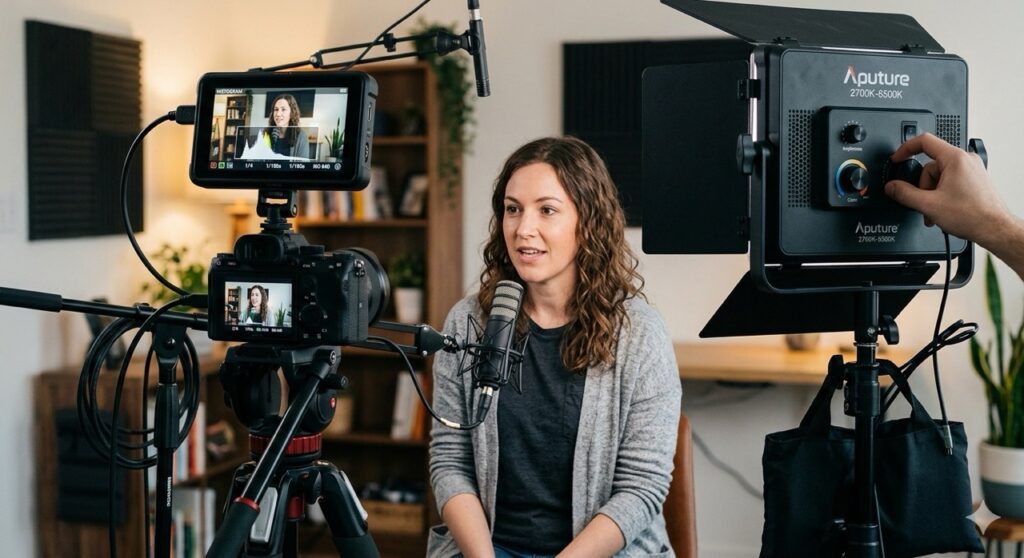
1) Talking-head educational videos
This is where my workflow became reliable first.
Typical setup:
- Sony FE 16-35mm f/4 ZA OSS
- controlled indoor lighting
- tripod locked
- moderate camera-to-subject distance
Sequence:
- Set framing.
- Set key light.
- Check zebra on critical face regions.
- Confirm histogram midtone body.
- Record 10-second test.
- Check quickly on larger display if available.
I used to skip step 5 and pay for it later. Test clips feel slow when you are in setup mode. They are fast compared to rescue-grade pain.
2) Outdoor run-and-gun creator b-roll
This is where consistency used to collapse for me.
Problem pattern:
- changing light every few meters
- variable aperture zoom behavior
- rushed framing changes
What helped:
- dividing shoot into small scene blocks
- one exposure philosophy per block
- pre-checking focal windows when using Tamron 28-200
I learned this after one sequence where wide clips looked bright and tight clips looked starved because aperture ramp hit mid-sequence and my reaction was late.
3) Hybrid day (video first, stills second)
On hybrid days, I keep expectations realistic.
I can get web-ready stills with careful exposure checks. For professional still-first output I prefer still-first tools and workflows. That expectation management prevented a lot of frustration.
Exposing S-Log3 ZV-E1 in harsh, mixed, and controlled light
This section is practical and specific because “Best exposure settings for Sony ZV-E1 S-Log3” gets asked a lot and generic answers rarely help.
Controlled light indoors
S-Log3 exposure decisions are easier indoors when lighting is stable.
If your lens is slower (like f/4 in low light), histogram helps expose midtone weakness quickly. I had multiple takes where the LCD looked normal and histogram showed a weak center body for subject skin. Light adjustment fixed it better than ISO pushing.
Mixed light indoors
One side warm practical light, another side cooler spill, maybe window contamination. This is where I used to chase “perfect graph shape” and lose consistency.
Now I lock priority:
- face first for speaking content
- allow background compromise
- keep sequence continuity
S-Log3 reward comes from consistency across clips, not isolated perfection.
Harsh outdoor light
Blue Mountains was the clearest lesson. Scene range exceeded one elegant compromise for my intent. Bracketing gave better result than wrestling one exposure all day.
If someone asks me “How to read Sony ZV-E1 histogram in bright sunlight,” my direct answer includes one uncomfortable truth: sometimes the correct reading is “this scene wants a different capture strategy.”
[IMAGE: Three-frame comparison from same scene: highlight priority, subject priority, bracketed blend]
CineEI Exposure Guide habits adapted for solo shooters
I’m not pretending my workflow is a full cinema discipline workflow, but borrowing CineEI Exposure Guide habits improved my consistency a lot.
Habits I copied:
- pre-decide exposure reference logic
- avoid changing reference emotionally mid-scene
- evaluate sequence-level consistency, not single-shot ego wins
What that looked like in daily shooting:
- morning: indoor setup with clear priority statements
- midday: backlit street with accepted highlight compromise
- afternoon: wide-to-tight b-roll with pre-tested focal endpoints
Without this structure, I used to drift from shot to shot and then spend hours matching clips in post.
With this structure, my edits got calmer and faster.
ETTR (Exposing to the Right) deep dive from creator workflow
ETTR is useful. ETTR is also easy to misuse.
Where ETTR helped me:
- moderate contrast scenes
- stable framing
- clear subject separation
- predictable grading plan
Where ETTR hurt me:
- mixed backlit scenes with skin priority
- high-pressure run-and-gun clips
- moments where I pushed right side out of habit instead of intent
I had one sequence where ETTR-style push looked “data-rich” but skin energy dropped. Grade recovered technical detail and lost emotional punch. That taught me a simple decision gate:
If subject expression is primary and scene contrast is aggressive, do not chase right edge just because ETTR is a known strategy.
Use ETTR as an option, not an identity.
ETTR quick checklist I now follow
- Does this scene reward more right-side data?
- Is subject still holding presence?
- Can nearby clips be matched without heavy correction?
- Am I making this decision calmly or reactively?
If question 4 feels reactive, I step back.
Luma Waveform vs Histogram: choosing by pace, not ego
People love arguing Luma Waveform vs Histogram like one tool is superior in every case. Field reality is less dramatic.
Histogram advantages in my workflow:
- very fast global distribution awareness
- easy to keep visible
- useful when framing changes often
Waveform-style logic advantages:
- precise luminance placement by image position
- stronger for controlled, deliberate setups
- better when exact tone zone targeting is priority
I mostly run histogram + zebra because my shooting rhythm is fast and creator-oriented. If I had a slower, locked production rhythm daily, waveform precision would matter more.
Tool choice should follow pacing constraints and output requirements. That’s it.
More long-tail question coverage (real pain points)
Why my ZV-E1 footage is noisy despite a perfect histogram (expanded troubleshooting)
Troubleshooting order I use:
- Check if subject midtones were actually strong enough at capture.
- Check whether grade is lifting too aggressively.
- Check whether lighting was underpowered for lens/aperture choice.
- Check if clip matching forced overcorrection.
- Check if monitoring assumptions changed mid-scene.
This often reveals the issue faster than plugin-first workflows.
Histogram vs Zebras: Which is better for Sony ZV-E1? (expanded practical answer)
For speed and confidence:
- Zebra first.
- Histogram second.
If you choose only one:
- zebra-only can miss global distribution drift
- histogram-only can slow decisions and create overthinking
Both together reduced my failure rate the most.
How the ZV-E1 histogram ruins skin tones in backlit scenes (expanded field diagnosis)
Skin tone problems in backlight usually come from priority confusion.
If you protect every bright region aggressively, subject drops too low. Then post lift reveals texture weakness. That is the failure path.
Fix path:
- state subject priority clearly
- allow controlled background compromise
- confirm midtone body quickly before long take
Does the Sony ZV-E1 histogram show RAW or JPEG data? (operational answer)
Treat on-camera histogram as guidance tied to current preview and processing context. Validate in your own pipeline. Keep monitoring assumptions consistent throughout scene blocks.
This approach is practical and repeatable for creators.
Using the histogram for ZV-E1 long exposure photography (expanded)
When I did long-exposure still tests at night:
- bright point sources clipped easily if I trusted visual preview alone
- histogram revealed clipping risk early
- bracketing gave better final mood in high dynamic scenes
Long exposure is slower by nature. Use that time to make cleaner capture decisions.
[VIDEO: Night long-exposure sequence with histogram checks and bracket comparison]
Post-production notes: what bad histogram habits look like on a timeline
You can diagnose capture habits by looking at how you grade.
My old habits looked like:
- frequent shadow lifts
- inconsistent clip exposure correction by shot
- extra noise reduction on “safe-looking” captures
- too many secondary adjustments to repair skin balance
My newer habits look like:
- smaller exposure trims
- more consistent sequence baseline
- fewer emergency fixes
- more time for color style and pacing
If your timeline is mostly repair work, capture process is the likely bottleneck.
The 30-day training loop I use to keep exposure judgment sharp
Day 1–5: indoor stability
- repeat one talking-head setup
- log small exposure changes and outcomes
- compare edits side by side
Day 6–10: outdoor shade/sun transitions
- fixed route with known light patches
- same subject framing variations
- focus on sequence consistency
Day 11–15: variable aperture zoom discipline
- pre-test focal endpoints
- capture consistent sequence blocks
- review continuity penalties
Day 16–20: backlit subject drills
- subject-priority vs highlight-priority versions
- compare emotional readability and grading effort
Day 21–25: high-contrast midday drills
- attempt one-frame compromise
- attempt bracketed strategy
- compare realism and effort
Day 26–30: consolidation and review
- review notes
- identify repeated errors
- update pre-shoot cue card
This routine sounds repetitive because it is. Repetition is where exposure intuition gets built.
Field cue cards (what I keep in my bag)
Cue card 1: Pre-record sentence
“What matters most in this frame?”
If I cannot answer quickly, I am not ready to record.
Cue card 2: Exposure flow
Zebra warning -> histogram confirmation -> commit one compromise.
Cue card 3: Variable aperture warning
Check focal endpoints before long take.
Cue card 4: Backlit warning
If subject is story anchor, keep subject integrity first.
Cue card 5: High contrast warning
If one-frame fight keeps failing, bracket and move.
These are simple and a little obvious. They still work when I’m tired and rushing.
Common myths I believed before getting better results
Myth: a centered histogram means good exposure
Reality: scene intent decides what “good” means.
Myth: perfect graph equals clean skin in post
Reality: weak subject midtones can hide inside “safe” distribution.
Myth: exposure problems are mostly fixed in grading
Reality: grading can recover some, not all. Rescue has quality cost.
Myth: more monitoring overlays always improve outcomes
Reality: too much toggling breaks rhythm and increases rushed errors.
Myth: ETTR is always superior
Reality: ETTR helps in context. Blind ETTR hurts subject presence in some scenes.
Decision matrix: quick choices under pressure
If indoors and underpowered light
- add light first
- verify histogram midtone strength
- avoid relying on post lift
If outdoors with harsh contrast
- lock scene priority quickly
- accept one compromise
- switch to bracketing if needed
If run-and-gun with variable aperture zoom
- pre-check focal ranges
- reduce mid-shot exposure wheel panic
- prioritize sequence continuity
If backlit and subject-led
- protect subject readability
- accept controlled highlight trade-off
- keep checks fast and consistent
What changed in my confidence
Early phase confidence:
- fake confidence during capture
- low confidence during edit
Current phase confidence:
- realistic confidence during capture
- calmer confidence during edit
That shift matters for creators working alone. You need a process you trust when you cannot outsource technical checks to a crew.
Appendix A: quick answers in one place
How to read Sony ZV-E1 histogram in bright sunlight
Shade LCD briefly, use zebra warning first, check histogram crowding, lock one scene priority.
Why my ZV-E1 footage is noisy despite a perfect histogram
Subject midtones likely weak for your grading intent, often from underpowered capture decisions.
Best exposure settings for Sony ZV-E1 S-Log3
Use a stable decision process, not one universal setting. Priority + zebra + histogram + short tests.
Histogram vs Zebras: Which is better for Sony ZV-E1?
Use both. Zebra for immediate warning, histogram for distribution confirmation.
How the ZV-E1 histogram ruins skin tones in backlit scenes
Skin suffers when highlight protection is forced without subject-priority logic.
Does the Sony ZV-E1 histogram show RAW or JPEG data?
Treat histogram as context-based monitoring guidance and validate in your own pipeline.
Using the histogram for ZV-E1 long exposure photography
Use histogram to protect bright point sources, bracket when dynamic range is extreme, prioritize stable capture.
Appendix B: my one-page pre-shoot worksheet
- Scene type:
- Subject priority:
- Highlight tolerance:
- Zebra behavior check:
- Histogram spread check:
- Lens behavior risk:
- One compromise accepted:
- Bracketing needed (yes/no):
- Test clip reviewed (yes/no):
- Notes for edit:
I keep this short and ugly on purpose so I actually use it.
Final close, for real
The Sony ZV-E1 Histogram didn’t make me a better creator by itself.
It made my mistakes visible fast enough that I could stop repeating them.
That’s the value.
Appendix C: 20 practical exposure failures and fixes (quick reference)
I’m adding this as a field reference because this is exactly what I needed during the first few months.
1) Backlit face looks lifeless
Cause: protecting background highlights too aggressively.
Fix: set subject priority, accept controlled highlight compromise, verify midtone body.
2) Indoor clip looks clean on camera but noisy in grade
Cause: weak capture midtones, especially with slower aperture and low light.
Fix: add light first, re-check histogram, then record.
3) Outdoor sequence brightness jumps shot to shot
Cause: exposure decisions changed reactively every frame.
Fix: lock one exposure philosophy for each scene block.
4) Variable aperture zoom causes hidden drift
Cause: focal length changed and aperture ramp altered light intake.
Fix: pre-test endpoints and avoid panic wheel changes mid-shot.
5) Histogram looks safe but skin still weak
Cause: global distribution acceptable while subject region lacks strength.
Fix: prioritize subject integrity and re-balance exposure intention.
6) Highlight clipping appears suddenly
Cause: bright region moved into frame and no zebra warning strategy was active.
Fix: zebra check before movement, quick histogram confirmation after reframing.
7) Sequence matches in exposure but feels flat
Cause: over-protective exposure pattern reduced contrast energy.
Fix: rebalance around subject impact, not only clipping fear.
8) Indoor interview at f/4 gets brittle in post
Cause: underpowered lighting created thin subject data.
Fix: lighting adjustment before capture, then validate with short test clip.
9) High-contrast midday scene never looks right in one frame
Cause: scene dynamic range exceeds comfortable single-shot compromise.
Fix: bracket with tripod and blend.
10) LCD confidence fails in bright sunlight
Cause: screen perception error under harsh ambient brightness.
Fix: shade screen briefly, use zebra warning first, then histogram.
11) Too many overlays, too little focus
Cause: monitoring clutter and constant toggling broke concentration.
Fix: simplify display and keep one fixed monitoring routine.
12) ETTR attempt leads to weak subject presence
Cause: right-side push forced without checking scene intent.
Fix: ETTR only when subject integrity and continuity remain strong.
13) Grade looks inconsistent across clips from same location
Cause: capture philosophy changed by mood, not by plan.
Fix: pre-declare intent per block and stick to it.
14) Skin tones shift unpredictably in mixed light
Cause: exposure adjustments prioritized background changes over subject stability.
Fix: lock subject anchor and tolerate controlled background variance.
15) Short clips look okay, long take drifts
Cause: lighting changed during take and no check cadence existed.
Fix: set check points between takes and monitor repeatability.
16) Shadows become muddy after correction
Cause: underexposure in capture with heavy post lift.
Fix: build stronger capture baseline, avoid rescue-grade dependence.
17) Highlight protection causes dull scene mood
Cause: fear-driven exposure choices.
Fix: decide emotional priority, then choose technical compromise.
18) Histogram reading anxiety slows shooting pace
Cause: over-analysis and no clear decision framework.
Fix: use 10-second routine: zebra, histogram, commit.
19) “Perfect settings” still fail in real-world movement
Cause: settings copied from static examples without dynamic scene adaptation.
Fix: rely on principles and process, not fixed recipe myths.
20) Repeating the same exposure mistakes weekly
Cause: no feedback loop from editing to capture process.
Fix: post-shoot debrief notes and one corrective action for next session.
Appendix D: long-form AEO answer blocks
These are expanded answer blocks for search intent and assistant-engine optimization while still grounded in practical use.
“How to read Sony ZV-E1 histogram in bright sunlight” (long answer)
Bright sunlight creates a perception trap because the LCD appears different from what your final file can sustain. I use a short routine that keeps me from overreacting:
- Stabilize framing for a few seconds.
- Check zebra in critical bright regions.
- Read histogram for total spread and edge pressure.
- Set one priority for this scene block.
- Record with that commitment.
If the scene has severe dynamic range, your best move may be a strategy switch instead of endless single-frame adjustment. That happened to me in Blue Mountains midday conditions, and bracketing gave a better real-world result than forcing one compromise forever.
“Why my ZV-E1 footage is noisy despite a perfect histogram” (long answer)
The phrase “perfect histogram” often hides a subject-data problem. Distribution can look stable while your subject midtones remain weak for your grading plan. This is common indoors with slower aperture lenses and limited light.
My fix path:
- evaluate subject midtone strength directly
- add light before pushing exposure recovery in post
- maintain consistent monitoring assumptions
- avoid clip-by-clip improvisation
Noise complaints dropped when I treated capture as the first correction stage instead of relying on post as rescue.
“Best exposure settings for Sony ZV-E1 S-Log3” (long answer)
There is no universal setting set that wins every location. The reliable method is decision consistency:
- define scene intent
- zebra warning setup
- histogram confirmation
- short test clips in tricky lighting
- continuity-focused capture across sequence
This method outperformed any static settings recipe in my own shoots.
“Histogram vs Zebras: Which is better for Sony ZV-E1?” (long answer)
Both are better together because they answer different questions.
- zebra answers where warning is happening
- histogram answers global tonal bias
In fast creator workflows, that pairing gives speed plus context. Using one alone created blind spots for me over time.
“How the ZV-E1 histogram ruins skin tones in backlit scenes” (long answer)
Skin tone issues in backlit scenes usually come from decision priority, not from the histogram itself. When bright background retention is over-prioritized, subject midtones weaken and post correction gets harsh.
I handle this by making subject intent explicit before recording and accepting controlled highlight trade-offs when necessary.
“Does the Sony ZV-E1 histogram show RAW or JPEG data?” (long answer)
From an operational perspective, use histogram as context-based exposure guidance tied to your active viewing pipeline and profile context. Then validate with test clips in your own grading environment. This practical approach keeps your decisions stable and avoids workflow confusion.
“Using the histogram for ZV-E1 long exposure photography” (long answer)
In long exposure stills, histogram helps prevent concentrated highlight clipping and supports better tonal spread decisions, especially in scenes with strong point light sources. Tripod stability, timing, and bracket strategy matter as much as graph shape.
Appendix E: shot log templates for consistent improvement
Shot log template (capture)
- Date and location:
- Scene type:
- Lens and focal range:
- Lighting condition:
- Scene priority:
- Zebra behavior:
- Histogram behavior:
- Compromise chosen:
- Notes:
Shot log template (edit review)
- Clip ID:
- Exposure correction amount:
- Noise impact:
- Skin tone quality:
- Highlight retention:
- Continuity with adjacent clips:
- Capture change for next time:
Weekly audit template
- Most repeated failure:
- Most improved behavior:
- Most useful tool pairing:
- One bad habit returning:
- One action for next week:
This documentation looks boring. It accelerated my progress more than any settings deep dive.
Appendix F: exposure micro-drills for ZV-E1 users
Drill 1: midtone integrity drill (indoors)
Goal: identify the lowest usable subject exposure baseline before noise issues appear in grading.
Method:
- Set stable talking-head frame.
- Record three takes with small exposure differences.
- Grade all three with same adjustment style.
- Compare skin integrity and noise.
Drill 2: backlight subject priority drill
Goal: maintain subject readability without uncontrolled highlight clipping.
Method:
- Place subject in backlit scene.
- Capture highlight-priority, subject-priority, and balanced versions.
- Compare emotional clarity and technical recovery.
Drill 3: variable aperture continuity drill
Goal: reduce exposure drift when zooming.
Method:
- Pick planned focal window.
- Pre-test both focal endpoints.
- Capture sequence without reactive wheel changes.
- Evaluate continuity in timeline.
Drill 4: harsh midday decision drill
Goal: decide quickly between single-frame compromise and bracketing.
Method:
- Capture two compromise attempts.
- Capture bracketed set.
- Compare realism and edit effort.
Drill 5: monitoring simplification drill
Goal: reduce UI friction and rushed decisions.
Method:
- Limit overlays to essential set.
- Use fixed pre-shot routine.
- Record one full session with minimal toggling.
- Compare error rate with prior session.
Appendix G: practical glossary in plain words
Sony ZV-E1 Histogram
A visual distribution tool that helps you see where tones are concentrated across shadows, midtones, and highlights during monitoring.
Mirrorless Camera Histogram
Histogram concept applied in mirrorless workflows; useful for quick exposure distribution checks in dynamic shooting conditions.
Exposing S-Log3 ZV-E1
Capture strategy for preserving grading flexibility while protecting usable subject data and sequence consistency.
Sony ZV-E1 Exposure Tools
Combined monitoring features and camera aids used for practical exposure decision making, including zebra and histogram.
CineEI Exposure Guide mindset
A discipline-oriented approach: stable reference, deliberate checks, consistent sequence logic.
ETTR (Exposing to the Right)
A strategy to place exposure toward higher tonal range without clipping important highlights, used contextually, not blindly.
Luma Waveform vs Histogram
Comparison between precise luminance mapping (waveform-style logic) and global tonal spread view (histogram), chosen by workflow pace and precision needs.
Appendix H: quick scenario scripts I read before shoots
These scripts are short reminders I read on my phone before different shoot types. They keep my exposure logic stable when I am tired or rushed.
Script 1: indoor talking head
“Subject clarity first. Add light before rescue mindset. Zebra check. Histogram midtone check. Record test. Commit.”
Script 2: outdoor bright sun
“Sun is deceptive on LCD. Shade screen briefly. Zebra warning first. Histogram crowding check. One compromise only.”
Script 3: backlit scene
“Person is anchor. Keep skin integrity. Accept controlled background trade-off. Avoid highlight panic.”
Script 4: variable aperture zoom day
“Check focal endpoints now. Do not trust continuity by feel. Keep exposure logic stable per sequence block.”
Script 5: high-contrast landscape
“If one frame keeps failing, bracket. Stop forcing perfect single exposure. Preserve edit options.”
I know this sounds repetitive. It is repetitive. That is the point.
The main reason I kept these scripts was mental consistency. Exposure errors were rarely caused by lack of features. They were caused by decision drift. Once I started using these reminders, my shoots felt calmer and my edits got cleaner.
And that’s probably the strongest practical lesson inside this entire Sony ZV-E1 Histogram journey: skill grows when your decisions stop changing every minute.